Integrated Android Banner with Google AdMob Ads Tutorial
5 minutes read
There are a lot mobile ad network which we can monetize and earn income with you app. Google provided a mobile ad network called AdMob to display ads in applications, so we can generate income from our Android App.
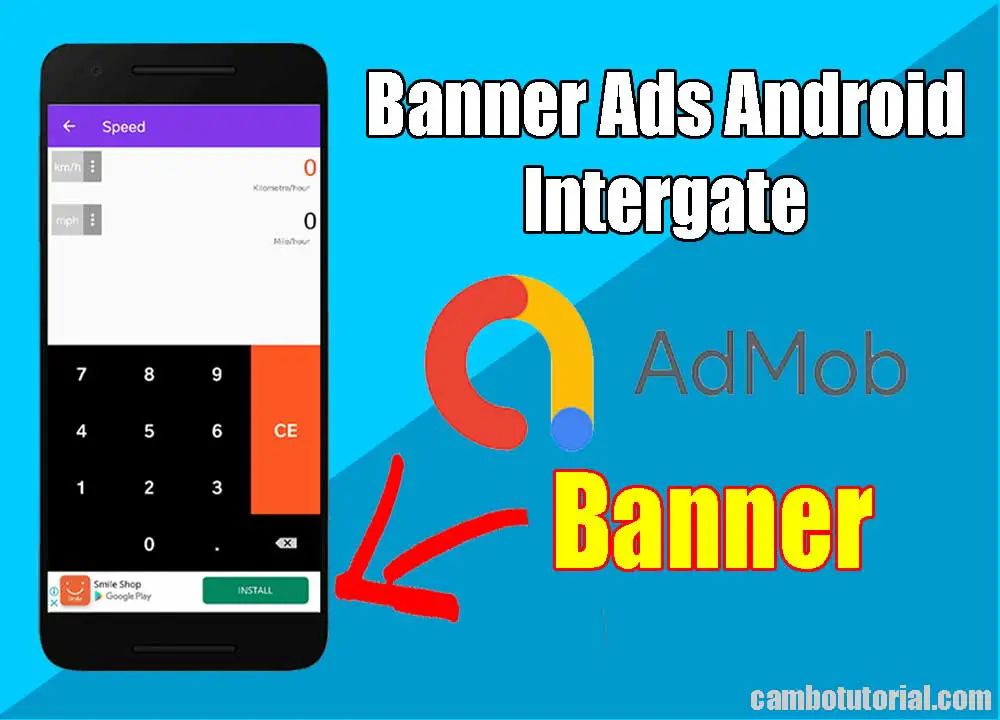
To earn the revenue by integrating Google AdMob ads in android applications, we need to follow below steps.
- Sign Up Admob Account
- Choose ad format and Create ad Unit
- Integrate Ads SDK into app
- Publish App into Playstore
Today we will learn how to implement Banner Admob Ad. I will try to keep it simple to understand for beginner.
Adding Adview to Layout File
We must insert AdView in the XML layout of the Activity or Fragment where you want it to appear. Basically, banner ad is displayed on top or bottom of you app UI.
<com.google.android.gms.ads.AdView
      xmlns:ads="http://schemas.android.com/apk/res-auto"
      android:id="@+id/adView"
      android:layout_width="wrap_content"
      android:layout_height="wrap_content"
      android:layout_centerHorizontal="true"
      android:layout_alignParentBottom="true"
      ads:adSize="SMART_BANNER"
      ads:adUnitId="ca-app-pub-3940256099942544/6300978111">
</com.google.android.gms.ads.AdView>
ca-app-pub-3940256099942544/6300978111 - ad unit id where you can find in Unit Ad of Admob Account.
Required attribute for AdView
ads:adSize- Set this to the ad size you'd like to use. I recommend useSMART_BANNERwhich is flexible by user screen device. You can check for adsize constant.ads:adUnitId- Set this to the unique identifier of your ad in app where ads are to be displayed. Don't be confused withad unit idandapp id
Once we create an application, open activity_main.xml file that located in app -> res -> layout and paste the code like as shown below.
<?xml version="1.0" encoding="utf-8"?>
<RelativeLayout xmlns:android="http://schemas.android.com/apk/res/android"
xmlns:tools="http://schemas.android.com/tools"
android:layout_height="match_parent"
android:layout_width="match_parent"
tools:context=".MainActivity">
    <com.google.android.gms.ads.AdView
        xmlns:ads="http://schemas.android.com/apk/res-auto"
        android:id="@+id/adView"
        android:layout_width="wrap_content"
        android:layout_height="wrap_content"
        android:layout_centerHorizontal="true"
        android:layout_alignParentBottom="true"
        ads:adSize="SMART_BANNER"
        ads:adUnitId="ca-app-pub-3940256099942544/6300978111">
    </com.google.android.gms.ads.AdView>
</RelativeLayout>
Implementing Ad in Java Class
Note: Make all calls to the Mobile Ads SDK on the main thread.
Open main activity java file MainActivity.java in app -> java -> package(com.cambotutorial.sovary.adtest) -> MainActivity.java write the code as shown below.
package com.cambotutorial.sovary.adtest

import ...
import com.google.android.gms.ads.AdRequest;
import com.google.android.gms.ads.AdView;

public class MainActivity extends AppCompatActivity {
    private AdView mAdView;

    protected void onCreate(Bundle savedInstanceState) {
        super.onCreate(savedInstanceState);
        setContentView(R.layout.activity_main);

        MobileAds.initialize(this, new OnInitializationCompleteListener() {
            @Override
            public void onInitializationComplete(InitializationStatus initializationStatus) {
            }
        });

        mAdView = findViewById(R.id.adView);
        AdRequest adRequest = new AdRequest.Builder().build();
        mAdView.loadAd(adRequest);
    }
}
mAdView.loadAd(adRequest); you may see red underline hightlight which is ask to add internet permission but we already done. Anyway If you build project another message error occure as below.
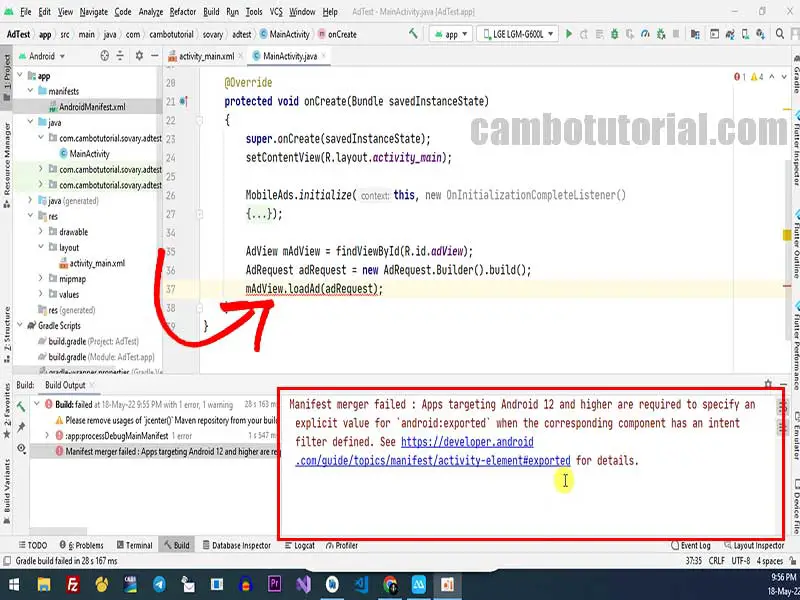
Open AndroidManifest.xml again and insert android:exported="true" in activity launcher. See below snippet code
<?xml version="1.0" encoding="utf-8"?>
<manifest xmlns:android="http://schemas.android.com/apk/res/android"
    package="com.cambotutorial.sovary.adtest">
    <uses-permission android:name="android.permission.INTERNET"/>
    <application
        android:allowBackup="true"
        android:icon="@mipmap/ic_launcher"
        android:label="@string/app_name"
        android:roundIcon="@mipmap/ic_launcher_round"
        android:supportsRtl="true"
        android:theme="@style/Theme.AdTest">
        <activity android:name=".MainActivity"
            android:exported="true">
            <intent-filter>
                <action android:name="android.intent.action.MAIN" />
                <category android:name="android.intent.category.LAUNCHER" />
            </intent-filter>
        </activity>
        <meta-data
            android:name="com.google.android.gms.ads.APPLICATION_ID"
            android:value="@string/AppID"/>
    </application>

</manifest>
@string/AppID where we have placed string in strings.xml file which is located in app -> res -> values -> strings.xml. Please read Integrated Admob in Android app
Output AdMob Banner Ads
We will get a result like as shown below
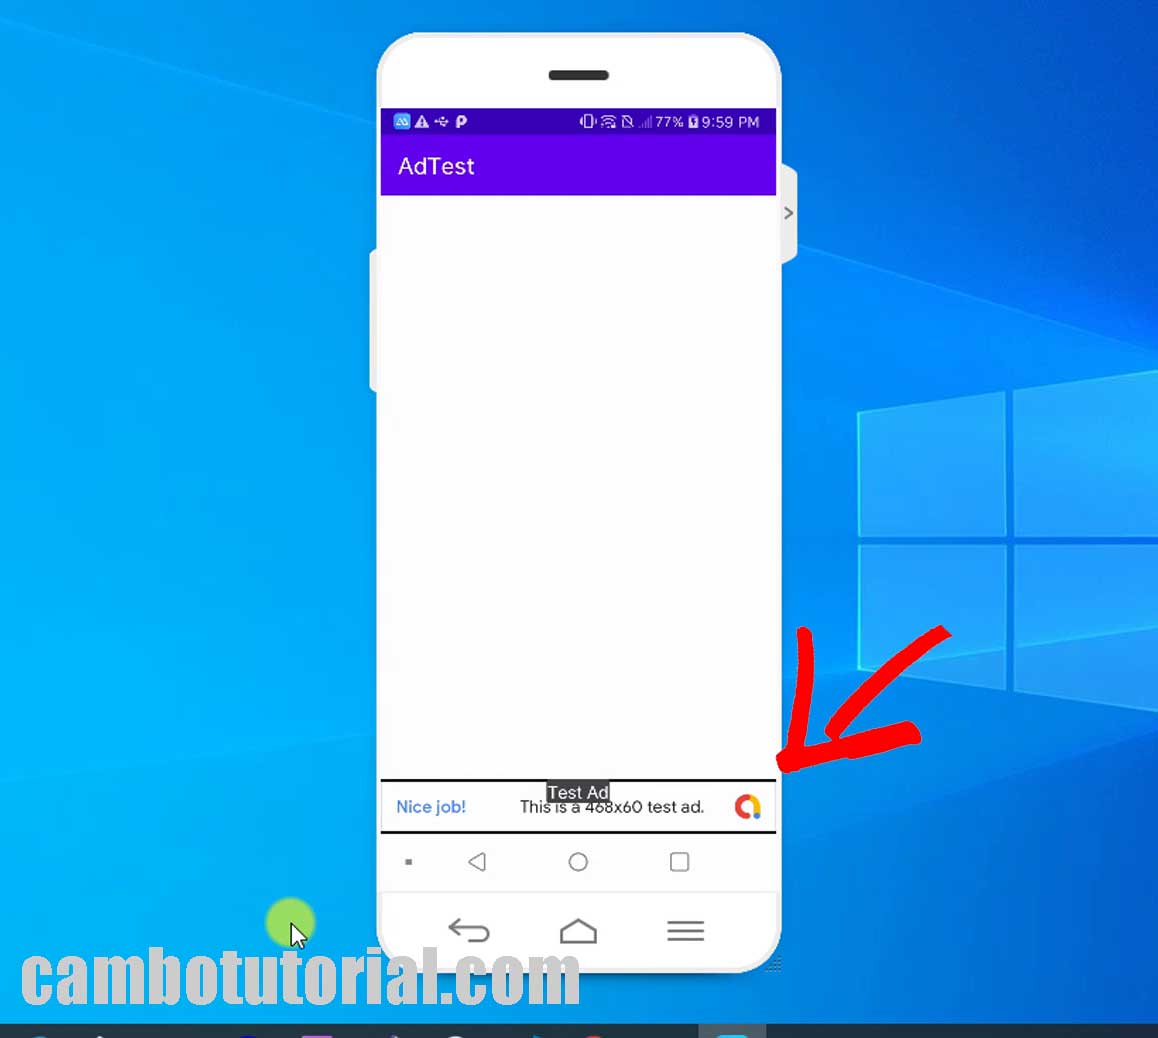
Yeah, your app is now ready to display banner ads. The below is optional method to interact with ad. If your app not work make sure you read this Integrate Android Google AdMob SDK Tutorial at first place.
For further customization ads behavior, you can look at these events below in ad's lifecycle such as opening, clicking, fail to load and so on. You can implement through the AdListener class.
mAdView.setAdListener(new AdListener() {
    @Override
    public void onAdLoaded() {
        // implement this block to initiate some action after ad is loaded.
    }
    @Override
    public void onAdFailedToLoad(LoadAdError adError) {
        // Code to be executed when an ad request fails.
    }
    @Override
    public void onAdOpened() {
        // Code to be executed when an ad opens an overlay that
    }
    @Override
    public void onAdClicked() {
        // Code to be executed when the user clicks on an ad.
    }
    @Override
    public void onAdClosed() {
        /* Code to be executed when the user is about to return
         to the app after tapping on an ad.*/
    }
});
onAdLoaded()- executed when an ad has finished loading.onAdFailedToLoad(LoadAdError error)- error parameter of typeLoadAdErrordescribes what error occurred. We can see the message error from those parameter.onAdOpened()- executed when user tab on an ad.onAdClosed()- executed when user returns to the app after viewing an ad's destination link.
I hope you will learn something in this page. Please find out more interesting articles below
You might Also Like:
- Integrated Banner Ad in Android
- Integrated Full Screen Ad in Android
- In-App Update Android Implement and Testing
- Build QR Code Generator in Android App
- Android Build Login with Fingerprint Biometric

Author
As the founder and passionate educator behind this platform, I’m dedicated to sharing practical knowledge in programming to help you grow. Whether you’re a beginner exploring Machine Learning, PHP, Laravel, Python, Java, or Android Development, you’ll find tutorials here that are simple, accessible, and easy to understand. My mission is to make learning enjoyable and effective for everyone. Dive in, start learning, and don’t forget to follow along for more tips and insights!. Follow him
Search
Tags
Popular Articles
-
10 minutes Build Bar Code and QR Code Scanner in Android App
16.74K -
Android - In-App Updates API Flexible and Immediate Show Update Available Dialog Inside App
10.04K -
Android Show a Biometric Fingerprint Authentication Dialog Example
8.46K -
How to Implement Awesome Chart Graph in Your Android App
7.87K -
Android - Firebase Realtime Database with CRUD Operation
5.98K -
Android - How to Generate QR Code in Android Studio free Source Code
5.3K


