Android - Convert Website to Android App and Solve Error Text Permitted
3 minutes read
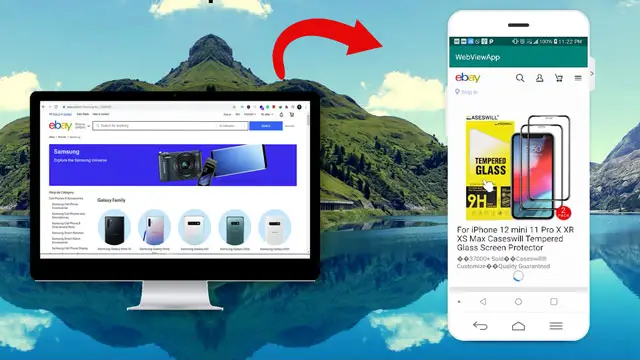
Are you looking for a method to turning a website into an Android app? If so, let me assure you that it is quite simple, and you will need to insert WebView with it.
Simply follow the lesson step by step, and your application will be ready to use. Webview is an element that may be used for this; add it to your XML (layout) file and implement it with several lines of Java code.

Note: please be sure the website should be responsive(mobile friendly).
Step 1: Create a new project in Android Studio (File -> New -> Project -> Select Empty Activty -> Name project WebViewApp -> Finish )
Step 2: We will place Webview in activity_main.xml ( Open res -> layout -> activity_main.xml )
<?xml version="1.0" encoding="utf-8"?>
<androidx.constraintlayout.widget.ConstraintLayout xmlns:android="http://schemas.android.com/apk/res/android"
    xmlns:tools="http://schemas.android.com/tools"
    android:layout_width="match_parent"
    android:layout_height="match_parent"
    tools:context="com.cambotutorial.webviewapp.MainActivity">
 <WebView
        android:layout_width="match_parent"
        android:layout_height="match_parent"
        android:id="@+id/webview"/>
</androidx.constraintlayout.widget.ConstraintLayout>
Step 3: We will implement on Java class. Let's open MainActivity.java ( src -> package -> MainActivity.java )
package com.cambotutorial.webviewapp;
import androidx.appcompat.app.AppCompatActivity;
import android.os.Bundle;
import android.webkit.WebView;
import android.webkit.WebViewClient;
public class MainActivity extends AppCompatActivity

{
    private WebView webView;
    @Override
    protected void onCreate(Bundle savedInstanceState)
    {
        super.onCreate(savedInstanceState);
        setContentView(R.layout.activity_main);
        webView = findViewById(R.id.webview);
        webView.setWebViewClient(new WebViewClient());
        webView.getSettings().setJavaScriptEnabled(true);
        webView.loadUrl("https://ebay.com");
    }
}
setWebViewClient(new WebViewClient()); we add this to prevent the website launch the browser after we click on some links which are run outside the app.
setJavaScriptEnabled(true); use for enabling Javascript to execute, some websites required to render UI.
Step 4: In android to be able to access the internet we have to add permission in AndroidManifest.xml. Open app -> manifests -> AndroidManifest.xml
<uses-permission android:name="android.permission.INTERNET"></uses-permission>
Step 5: In the browser whenever we go to a website and click other links that will add in history so now we will implement on back press button to go to the previous history website unless there is no more history we will exit the application. Let's open MainActivity.java
@Override
public void onBackPressed()
{
    if(webView.canGoBack())
    {
      webView.goBack();
    }
    else
    {
      super.onBackPressed();
    }
}
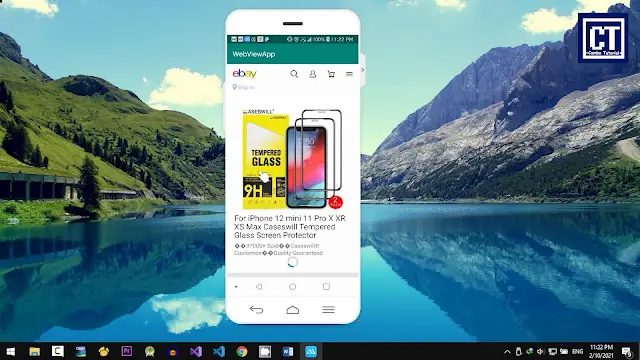
In this step, we can try to run the application and we can see it works fine.

Anyway, we might get an error if we place the link which starts with http:// not https:// the error would show net::ERR_CLEARTEXT_NOT_PERMITTED .
Step 6: In AndroidManifest.xml. Open app -> manifests -> AndroidManifest.xml
we insert an attribute value in the application element android:usesCleartextTraffic="true"
<?xml version="1.0" encoding="utf-8"?>
<manifest xmlns:android="http://schemas.android.com/apk/res/android"
    package="com.cambotutorial.webviewapp">
    <uses-permission android:name="android.permission.INTERNET"/>

    <application
        android:usesCleartextTraffic="true"
        android:allowBackup="true"
        android:icon="@mipmap/ic_launcher"
        android:label="@string/app_name"
        android:roundIcon="@mipmap/ic_launcher_round"
        android:supportsRtl="true"
        android:theme="@style/AppTheme">
        <activity android:name=".MainActivity">
            <intent-filter>
                <action android:name="android.intent.action.MAIN" />
                <category android:name="android.intent.category.LAUNCHER" />
            </intent-filter>
        </activity>
    </application>
</manifest>
After adding a line above the app can access any protocol and not produce an error. You can watch the video below to find out more clearly
You might Also Like:
- Laravel 9 - How to Generate Sitemap XML File
- Laravel 9 Resize Thumbnail Image
- How to Upload File in Laravel 9
- Laravel Mail - Laravel 9 Send Email Tutorial
Javascript Android Java Video

Author
As the founder and passionate educator behind this platform, I’m dedicated to sharing practical knowledge in programming to help you grow. Whether you’re a beginner exploring Machine Learning, PHP, Laravel, Python, Java, or Android Development, you’ll find tutorials here that are simple, accessible, and easy to understand. My mission is to make learning enjoyable and effective for everyone. Dive in, start learning, and don’t forget to follow along for more tips and insights!. Follow him
Search
Tags
Popular Articles
-
Android - Convert Website to Android App and Solve Error Text Permitted
4.45K -
Remove Specific JSON Object from JSON Array
1.33K -
Getting Date and Time Format in Node.js Example
1.29K -
Javascript - Array.sort() Does not Sort Number Correctly with Example
954 -
Convert Image to Base 64 String and Display using Pure Javascript
936 -
JavaScript-setTimeout inside Loop not work correctly
918


